New Grill Means Cooking a Rack of Pork Ribs

Any time I get a new grill, my first cook is always ribs.
Why?
Because the margin of error on ribs, due to their high fat content, makes it hard to screw them up as I learn the idiosyncrasies of a new cooker. I also know almost to the minute how long the ribs should take based on thousands of previous rib cookouts. I like to cook my ribs using the high-heat method of 300F, which is really medium heat, but that doesn’t have the same alliteration as high-heat. For me, baby backs take right around 2 hours, St. Louis style take 20-30 minutes longer and full spares take another 20-30 minutes longer than St. Louis Style. Beef ribs are a whole other animal (no really) and subject for another article that we will one day link to here. Let’s get back to baby backs, St. Louis style and full spares and break those three down in depth.
While I say that we are talking about three different kinds of ribs, we are really only talking about two kinds of pork ribs (excluding country style ribs which aren’t really ribs). Baby backs are one kind and St. Louis style are just trimmed spare ribs. The baby back ribs come from the top of the pig, right off the spine. The spares extend off the baby backs and come down the side of the pig. Baby backs have a much more curved bone than the spares, are smaller but tend to have more meat to bone ratio than spares.
Here are some baby back ribs:

Baby back ribs are my favorite ribs. I don’t hate spares. I just prefer baby backs. The way I see it is this, if the worst thing that happened to me in a day is that I ate spare ribs, I had a damn good day. That being said, I haven’t eaten baby backs in close to a year. At the time of writing this article, baby backs in my area are anywhere between $5-$7/pound. I can get spares on sale for around $2/pound. Why are baby backs more expensive? A couple of reasons. One, by weight, there are less baby back ribs per pig than spares. Also, baby backs are, “eating high on the hog.” That phrase has been used to show someone is living the good life for a few thousand years because those that could afford the cuts high on the animal were wealthy. The baby backs and the tenderloins are high on the animal which means they don’t get much work by the animal and stay tender. The rich took the cuts high on the animal and the rest of us had to make due with what was left. The jokes on them though, pork belly is low on the hog and that’s where bacon comes from!
So how do we get St. Louis style ribs out of a slab of spares and why would we do such a thing? First the why. That big slab of untrimmed spare ribs has a lot of thin flaps of meat that will be dry before the thicker meat is cooked through. Essentially it cooks unevenly when done whole. Also, there’s a lot of cartilage and small bones.
Here’s a full, untrimmed slab of spares:

To make them St. Louis style is simply to trim them into a uniform, rectangular slab that will cook evenly. The vast majority of competition cooks will use St. Louis style spare ribs.
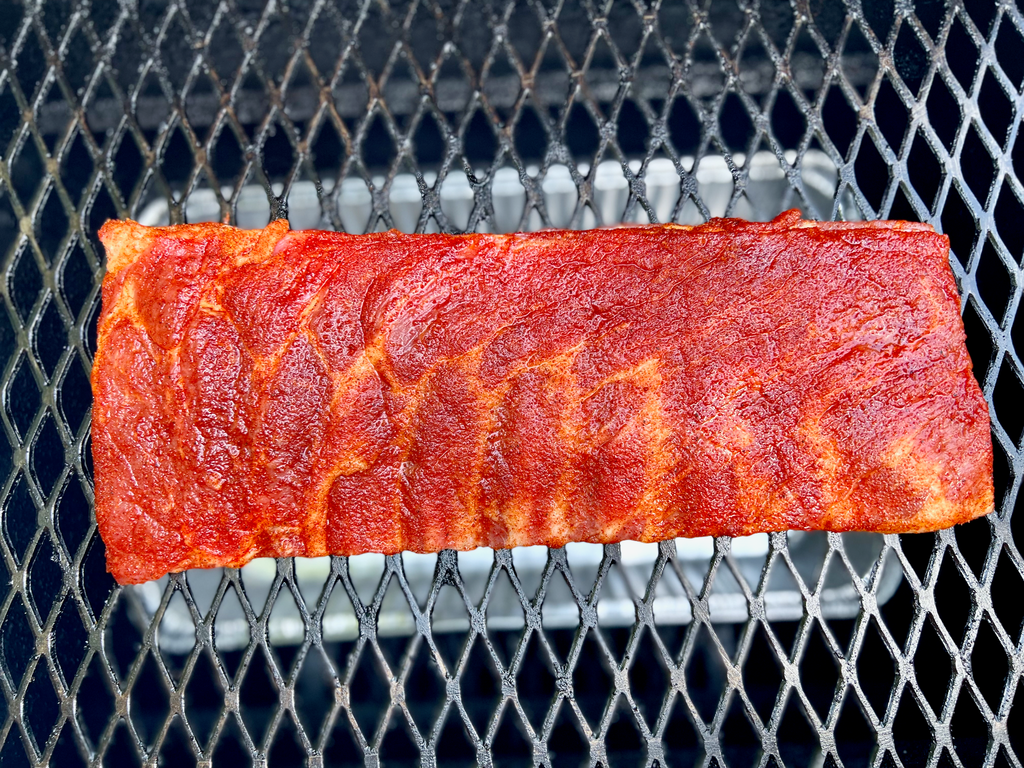
An untrimmed slab of spares look like this:

To make them into St. Louis style, look at an untrimmed slab and imagine a rectangle slab of ribs hidden in there that once seasoned look like this:

The cuts that need to be made are the long one along the top, the thick chunk on the left side, the thin piece on the right, and the little flap along the bone side (optional):

That thin piece along the bottom can be left on, but I generally take it off. It’s my favorite piece of the trimmed meat:

Also, just because we trimmed all this meat off doesn’t mean we are pitching it in the garbage. For my family, we throw those smaller bits on the grill and enjoy them while the slab(s) cook(s) as these smaller pieces cook faster than an entire slab. It’s a fantastic way to test out a variety of new rubs on cooked meat.
Now that we have the ribs trimmed to be St. Louis style, it’s time to finish up the prep on these slabs. First off, pull the membrane. Paper towels are your friends here. Use them to grab the corner of that membrane that runs along the backs of the bones on the underside of the ribs. The paper towels allow you to grip the slippery membrane:

Then apply any binder you choose to use to help the seasoning adhere to the slab. Some options are mustard, vegetable oil, and my favorite mayonnaise. No, the ribs will not taste like mustard or mayo. That binder will melt off the meat as the ribs cook. I prefer the mayo for the fat content which also bastes the meat as it melts away.
Always start on the bone side so the natural concave of the bones will keep the binder and rub up off the cutting board, which both will stick too, and thus negate the need to re-apply. Bone side:

Flip over the ribs and repeat on the meat side and then place the slabs on the grill: